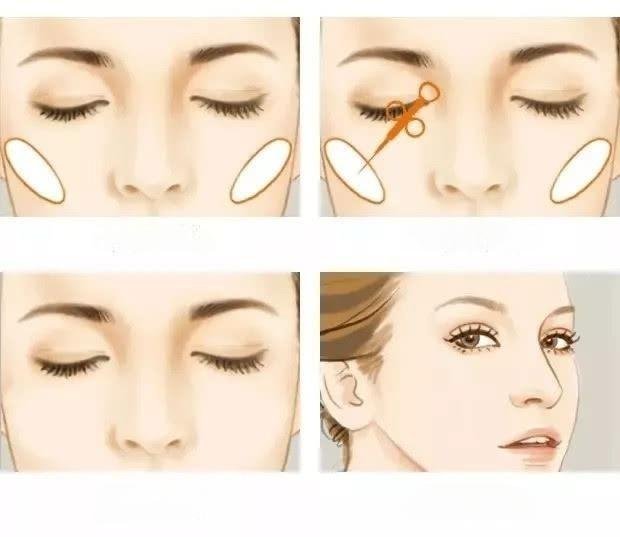
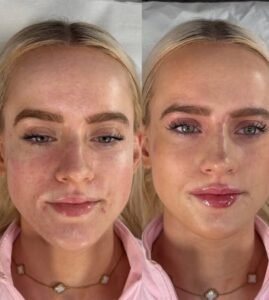
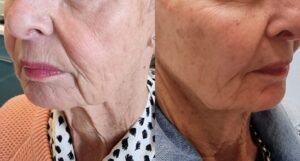
01. Main clinical applications of hyaluronic acid
Improve wrinkles: inject into the dermis and subcutaneous layer of the wrinkle area to fill the wrinkles; such as forehead wrinkles and frown lines; mainly suitable for the treatment of static wrinkles.
Improve depression: inject into the skin or deep subcutaneous layer of the body surface to improve the appearance by increasing the volume. Such as injection of nasolabial folds and tear grooves.
Improve contour: inject into the position where the contour needs to be increased to meet the standards of facial aesthetics, such as sunken temples and low foreheads.
Modify facial features: the aesthetic standards of facial features can be adjusted through injection: such as injection of rhinoplasty and lip augmentation.
02. Injection layers and positions of various parts
Hyaluronic acid injection can generally be injected into four layers of the skin: subcutaneous, superficial subcutaneous layer, dermis and periosteum.
Key points for forehead wrinkles:
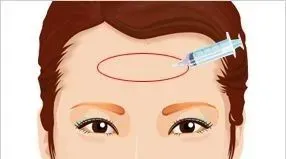
Injection position: supine or semi-recumbent
Anesthesia method: no anesthesia or surface anesthesia or ice compress
Injection layer: deep dermis and superficial subcutaneous layer
Injection dose: depends on the actual situation of wrinkles
Note: It is recommended to combine treatment for wrinkles in this area for better effect, first hyaluronic acid filling and then botulinum toxin injection.
Injection method:
1. Let the customer lie flat and raise his eyebrows upward, mark the direction of the wrinkles and the injection range
2. Insert the needle nearly horizontally along the direction of the wrinkles, with the needle tip beveled upward, pierce into the deep dermis, and perform continuous linear injection while withdrawing the needle and pushing the medicine. Longer wrinkles can be divided into 2~3 needle insertion points, and the injection is performed until the skin is slightly raised, and then pressed and smoothed;
3. For wider or deeper wrinkles, the fern leaf-shaped (continuous small fan-shaped) injection method can be used as the bottom support in the shallow layer of the subcutaneous layer, and then continuous linear injection is performed in the deep dermis.
Precautions:
1. If the patient has obvious pain, it may be that the needle is inserted too shallowly, and the needle should be inserted again;
2. Inject a small amount first, and then supplement the injection according to the situation. Do not inject too much at one time;
3. Maintain the consistency of the injection level to avoid asymmetry after correction;
Common adverse reactions and countermeasures:
1. Hematoma: mostly caused by shallow injection, generally no treatment is required.
2. Local bulge: caused by excessive injection. Once discovered, you should try to squeeze out the excess filler, or use a thick needle to loosen the surrounding subcutaneous tissue, and then press to flatten it.
Key points of temple operation:

Injection position: supine or semi-recumbent
Anesthetic method: local infiltration anesthesia at the needle port
Injection level: periosteum, subcutaneous
Injection dose: according to the actual situation (1~3mI/side)
Injection method:
1. Mark the sunken area with a marker:
2. Make a needle port at the front edge of the hairline, and perform local infiltration anesthesia at the needle port, with a dose of 1ml:
3. Perform fan-shaped injection on the periosteum of the contact area, and press and shape it after it is lowered.
4. Observe the deficiencies and make a small amount of dot injection under the skin to supplement and adjust.
Precautions:
1. You can mark the visible superficial veins of the contact area first to avoid accidental injury during injection;
2. Be sure to draw blood back after inserting the needle and before injection.
Common adverse reactions and countermeasures:
Bleeding: Press with local ice packs, and continue injection after stopping bleeding; if there is too much bleeding and the contact area is obviously bulging, the injection should be stopped and injected again after 2 weeks.
Blindness: This is the most serious complication, but it rarely occurs. Strictly control the injection level and always draw back the blood before injection.
Chin operation points:
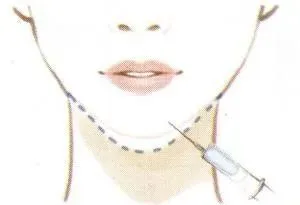
Injection position: supine or semi-recumbent
Anesthesia method: no anesthesia, or surface anesthesia, or ice
Injection level: periosteum, subcutaneous
Injection dose: within 1mI
Injection method:
1. Make preoperative marks and locate the center point:
2. Insert the needle vertically at the injection center point until it reaches the periosteum, first perform a single point or a small fan-shaped cone injection, and then gradually retreat to the subcutaneous area to form a satisfactory height of the lower forehead bulge;
3. Press and shape, and for areas where the lines are not continuous, a small amount of supplementary injection can be made under the skin according to the situation.
Precautions:
a. Try to inject as deep as possible to obtain a stable lower cheek structure
b. Patients who only perform fine-tuning shaping can only do a small amount of injection under the skin.
c. For severe lower cheek retraction, surgical prosthesis implantation should be recommended
d. Botulinum toxin injection can be performed at the same time to achieve better appearance adjustment.
Common adverse reactions and countermeasures:
Local abnormal bulges——
Caused by excessive subcutaneous injection of fillers, try to inject deep into the periosteum;
Hyaluronidase can be used for treatment
Poor shape or left-right asymmetry——
Corrected by pressing and shaping within a week
Supplementary injections can be performed for adjustment after more than two weeks.
Key points for crow’s feet:
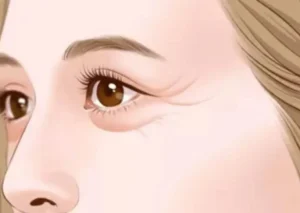
Injection position: supine or semi-recumbent
Anesthesia method: no anesthesia or surface anesthesia or ice pack
Injection level: middle and deep dermis
Injection dose: according to actual situation
Remarks: It is recommended to combine treatment for wrinkles in this area for better effect, first hyaluronic acid filling and then botulinum toxin injection.
Injection method:
1. The patient lies flat, smiles and squints, and marks the direction of wrinkles and injection range;
2. Insert the needle with the needle tip beveled upward along the direction of the wrinkle, pierce the middle layer of the dermis, and inject continuously in a linear manner. The left hand can help tighten the skin to facilitate the control of the depth of the needle. Press and smooth it after injection;
3. For wider and deeper wrinkles, the fern leaf injection method can be used to slightly strengthen the injection in the deep layer or on both sides;
4. Let the patient smile and squint to observe the deficiencies, and make supplementary injections in the superficial dermis.
Notes:
1. Botox has the best effect on crow’s feet and should be the first choice
2. The muscles here are thin, so the injection should be slightly shallow to avoid injecting into the muscle.
3. Remember to withdraw before injection.
4. Do not inject too much, and be natural to avoid local bulges when smiling.
Key points of nasolabial folds:
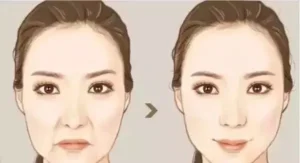
Injection position: supine or semi-recumbent
Anesthesia method: sharp needle: no anesthesia or anesthetic cream can be used for surface anesthesia or ice compress
Double needle: 0.1ml lidocaine is used for local infiltration anesthesia at the injection point
Injection level: multi-level injection in the dermis, subcutaneous, and periosteum
Injection dose: 0.5~1ml per side.
Sharp needle injection technique (shallower nasolabial folds):
1. Insert the needle from bottom to top along the wrinkle direction, and inject continuously in a linear manner under the skin to the micro-convexity;
2. The outer nose area close to the nose base is generally wider and deeper, and the fascia can be strengthened.
3. Press and shape, and according to the situation, a small amount of continuous linear injection is injected into the deep dermis for supplementary treatment.
Sharp needle injection method 2 (deeper nasolabial folds):
1. First fill the nose triangle area, insert the needle obliquely until it reaches the periosteum, and perform point injection. After it is slightly raised, press and shape it. Generally, 1 to 3 points are injected. The nose base can be seen to be lifted and the nasolabial groove becomes shallower.
2. In the outer nose area and the outer upper lip area, perform multiple injections deep under the skin. After it is slightly raised, press and shape it. The nasolabial groove can be seen to be further shallowed.
3. Follow the direction of the nasolabial groove and perform continuous linear injections in the deep dermis of the entire nasolabial groove.
Blunt needle injection method:
1. Needle insertion site positioning: The needle insertion point is positioned at the tail of the nasolabial groove;
2. Incision anesthesia: Use a incision needle to open the needle insertion site and inject 0.1mI lidocaine at the needle insertion site for local infiltration anesthesia;
3. Injection: Use a blunt needle to perform radial injections to the side of the nose with the tail of the nasolabial groove as the center.
Note:
1. Do not inject too shallowly, which may cause visible bulges and is not easy to solve by pressing;
2. Avoid injecting outside the nasolabial groove, which will aggravate the nasolabial groove.
Common adverse reactions and countermeasures:
Local depression or bilateral asymmetry: additional injection can be performed after 2 weeks.
Local bulge or caterpillar-like appearance when smiling: caused by too shallow injection or excessive linear injection. Local hot compress can promote absorption.
03. Normal reactions after injection
(1) Pathological mechanism: The injection operation is the process of the needle piercing the tissue and injecting the drug solution. The body will naturally produce tissue reactions: local vasodilation, accelerated blood flow, blood oozing and coagulation, local tissue swelling, etc.
The severity of the injection reaction is related to the degree of damage to the tissue by the needle and the degree of stimulation of the drug solution to the tissue.
(2) Clinical manifestations: The injection reaction manifests as bleeding from the needle hole at the injection site, occasional bruises, redness of the skin, mild swelling, pain, etc. These are all normal reactions after injection and generally do not require treatment and can be recovered within a few days.
(3) Prevention and treatment: Anesthesia before injection, compression and cold compress after injection can be used to alleviate symptoms;
Using a thinner needle or a blunt needle can reduce the degree of injection reaction.
